


Horticulture Design
How to start Seedlings with Grow Lights

Mar
How to Start Your Seedling Under a Grow Light
Starting your seedlings under a grow light is an effective way to ensure they get the necessary light and nutrients needed for healthy growth. Here are some tips on how to start your seedling under a grow light:
Materials You Will Need
- Seeds
- Growing trays or pots with drainage holes. Food safe Silicone Ice cube trays are ideal as the can be cleaned and reused for a very low price
- Potting soil or hydroponics using Cotton wool or similar
- A suitable grow light (LED, fluorescent, or high-intensity discharge)
- Timer switch, for your light, something you can set and forget
- Watering can
Steps to Follow
- Choose the right location: Find a suitable spot in your home that receives enough natural sunlight but also allows you to control the amount of artificial light.
- Set up your grow lights: Place the grow lights overhead at a height of 6 inches above the seeds tray. A small rack system is practical
- Determine which type of bulb is best: LED bulbs use less energy and produce less heat while fluorescent bulbs are cheaper and cover more area.
- Adjust lighting schedule based on plant needs: Seedlings require between 14 -16 hours of intense bright white/orange-red spectrum per day, so set up timer switches for automatic switching ON/OFF times.
- Fill growing containers with potting mix: Fill each container with moistened potting mix until it’s about three-quarters full.
- Plant seeds according to instructions: Make sure you sprinkle them evenly throughout each container following planting depth requirements indicated by seeds’ package instructions.
- Water carefully after planting: Gently soak each container from below using watering cans till water seeps through drainage holes at bottom then place back into trays. It is sometimes a good idea to maintain a sealed humid environment however it may depend on your ambient temperatures and humidity. The ideal temperature for seed germination varies widely depending on the type of plant. However, as a general guideline, most seeds germinate best in soil temperatures between 68°F and 86°F (20°C to 30°C). This range is suitable for a wide variety of vegetables, flowers, and other plants. Here’s a more detailed look:
- Cool-season vegetables (like lettuce, peas, and spinach) prefer soil temperatures around 50°F to 68°F (10°C to 20°C) for optimal germination.
- Warm-season vegetables (such as tomatoes, peppers, and cucumbers) typically require warmer soil temperatures in the range of 68°F to 86°F (20°C to 30°C).
It’s also important to differentiate between soil temperature and air temperature. Soil temperature is often a more critical factor for seed germination than air temperature because it directly affects the seed and its immediate environment. Soil temperatures are generally more stable compared to air temperatures, which can fluctuate significantly between day and night.
To ensure the best germination rates:
- Use a soil thermometer to measure the soil temperature at the depth where you will be planting your seeds.
- For seeds started indoors, maintaining the ambient temperature in the recommended range can help ensure that soil temperature remains optimal for germination.
- Heating mats can be used to maintain ideal soil temperatures for seed starting, especially when dealing with warm-season crops early in the season when indoor temperatures might be too low.
Adjusting planting times based on soil temperature rather than the calendar date can lead to more successful germination and healthier, more vigorous seedlings.
- Monitor growth progress closely and adjust lighting as necessary. For example; if there’s any sign of leggy stems adjust heights or move closer/further away from plants.
Lighting Considerations
When starting seedlings under grow lights, it’s important to provide enough light for the plants. Most seedlings require between 12-16 hours of light per day, depending on the plant species. According to the University of Minnesota Extension, most seedlings require a light intensity of at least 1,000 to 1,200 foot-candles(typically around 10000 Lux) for optimal growth. However, this can vary depending on the plant species and the type of grow light you are using. For example, LED grow lights tend to be more energy-efficient than traditional fluorescent or HID lights, which can impact the light intensity required.
To determine the optimal distance between your grow light and your seedlings, it’s recommended to start with the manufacturer’s guidelines and then adjust as needed based on the growth of your plants. You can also use a light meter to measure the light intensity and ensure that your seedlings are receiving enough light.
But lets consider for a moment Harvesting(not the plants) the light
Daylight harvesting is a strategy used to reduce energy consumption by utilizing natural light to its maximum potential, thereby reducing the reliance on artificial lighting. When growing seeds indoors with the combination of natural light and LED supplemental lighting, you can optimize energy consumption by integrating daylight harvesting principles in the following ways:
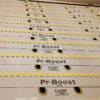
- Light Sensors: Install light sensors that can detect the intensity of natural light available in the area where the seeds are growing. These sensors can automatically adjust the output of LED supplemental lights based on the amount of natural light detected, ensuring that plants receive the optimal light levels for growth while minimizing energy use.
- Timers and Control Systems: Use timers and smart control systems that can be programmed based on the natural light cycle. For example, LED lights can be set to turn on only during the early morning or late evening when natural light levels are insufficient, and turn off or dim during the middle of the day when natural light is abundant.
- Strategic Placement: Position your growing area near windows or in areas where natural light is most available throughout the day. This placement allows you to take advantage of the maximum amount of natural light, reducing the need for supplemental lighting.
- Reflective Surfaces: Utilize reflective surfaces around the growing area to maximize light dispersion and intensity. Reflective materials can help bounce natural light onto the plants from different angles, making the most out of the available sunlight.
- Adjustable LED Lighting: Implement LED lighting solutions that allow for adjustable intensity and spectrum. This flexibility ensures that you can tailor the supplemental lighting to complement the natural light, providing your plants with the ideal light conditions for growth without wasting energy.
- Monitoring and Adjustment: Regularly monitor plant growth and adjust your daylight harvesting strategy accordingly. Plants’ lighting needs can change as they grow, so it’s important to be flexible and responsive in adjusting both natural and supplemental lighting to maintain optimal conditions.
By incorporating these daylight harvesting techniques, you can significantly reduce the energy consumption of your indoor growing setup. This approach not only saves energy but also can contribute to healthier plant growth by providing a more natural light cycle and conditions that closely mimic the outdoor environment.
Most sources of information take a simple view of spectrum and refer to lights from 5000-6500K for seedlings. This is not completely wrong but all plants, like children are not the same in their needs, enough light is critical but spectrum is loosely considered. A lot of sources make the assessment that the 5000-6500k is based on sunlight, typically at midday, however midday sun contains the primary reference for all light, 100CRI(Colour Rendering Index), meaning the Sun is Full Spectrum so that between 400-700nm all colours have a peak CRI of 100, all the colours of the rainbow.
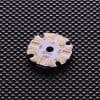
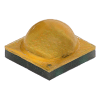
So lets consider a 6500k fluorescent, this will typically be between 70- 80 CRI. Its skewed more to the blue end of the spectrum, so not in fact sunlight. A more nuanced approach would be a Led light source that is adaptable or tuneable. We produce a light source specific to seedling performance

Tips For Success
Here are some additional tips that will help you successfully start your seedlings under a grow light:
1) Always keep soil moist but not soaking wet.
2) Use fertiliser only when plants have developed their true leaves.
3) Keep temperature at around 18-24°C (65-75°F) during germination process .
4) When transplanting young plants remember hardening off period before placing outdoors..
5) Clean equipment thoroughly in-between uses using bleach solution(10%).
Following these steps along with our useful tips should help ensure success when starting seedlings under a growing light system!
Thank you for this information, it was very helpful for a beginner gardener starting veggies from seed.