


Led Technology, Uncategorized
Tips for Installing Flexible Led Strip with Coding Examples for Dimming

29
Jan
Jan
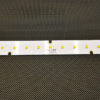
Installing LED lighting strip ribbon can be a fun and easy task, just follow these top 10 tips to make sure you get it right.
- Measure up: Before you start cutting, make sure you measure the area where you want to install the LED strip, this way you’ll avoid making any mistakes. Plus, you’ll look like a pro measuring things twice before cutting once.
- Connect the power: Once you have the right length, connect one end of the ribbon to the power supply. Make sure to match the wires on the LED strip ribbon to the correct connections on the power supply or you’ll end up with a dark room.
- Clean up your act: Clean the surface where you’ll be attaching the ribbon, this way the tape or clips will stick better and your LED strip won’t fall off after a few days.
- Stick it to ’em: Apply adhesive tape or use mounting clips to attach the ribbon to the surface, this way you’ll have a secure installation.
- Connect the other end: Make sure the other end of the ribbon is also connected to the power supply and the connections are secure.
- Test it out: Turn on the power supply and test the lights to make sure they’re working properly.
- Diffuse the situation: If you’re installing the LED strip ribbon in a location that will be visible, use a diffuser to reduce the visibility of the individual LEDs and create a more even light distribution.
- Follow the instructions: Always follow the manufacturer’s instructions and safety precautions when installing LED lighting, you don’t want to burn your house down.
- Insulate the connections: Use electrical tape to insulate the connections, this will prevent short circuits and prolong the life of the LED strip.
- Don’t overdo it: Remember to use enough tape or clips to hold the LED strip in place, but don’t overdo it, you don’t want to damage the surface or the LED strip itself.
By following these tips, you’ll have a successful installation and a bright room with a cool LED strip. And who knows, maybe you’ll even impress your friends and family with your new lighting skills.
Dimming Code examples using popular microcontroller platforms, Arduino, Raspberry Pi Pico and ESP32

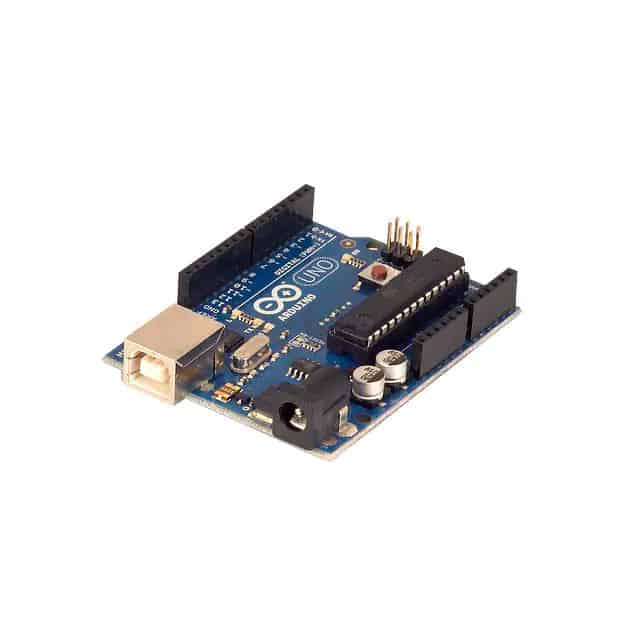
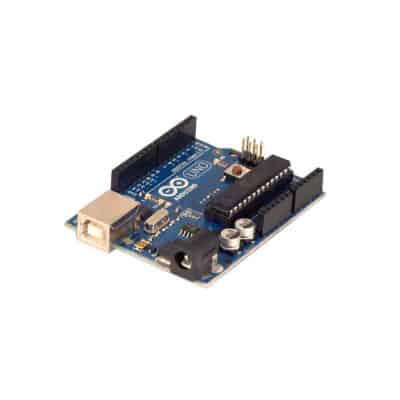
Here are some code examples of how to dim an LED lighting strip ribbon using an Arduino Uno microcontroller:
Example 1: Using a potentiometer to control the brightness of the LED strip:
int potPin = 0; // select the input pin for the potentiometer
int ledPin = 9; // select the pin for the LED
int val = 0; // variable to store the value coming from the sensor
void setup() {
pinMode(ledPin, OUTPUT);
}
void loop() {
val = analogRead(potPin); // read the value from the potentiometer
val = map(val, 0, 1023, 0, 255); // map the value to a range of 0-255
analogWrite(ledPin, val); // use the analogWrite function to set the brightness of the LED
}
Example 2: Using a push button to switch between different brightness levels:
int buttonPin = 2; // select the input pin for the button
int ledPin = 9; // select the pin for the LED
int val = 0; // variable to store the value for the LED brightness
int buttonState = 0; // variable to store the state of the button
void setup() {
pinMode(ledPin, OUTPUT);
pinMode(buttonPin, INPUT);
}
void loop() {
buttonState = digitalRead(buttonPin); // read the state of the button
if (buttonState == HIGH) { // if the button is pressed
val = val + 25; // increase the brightness by 25
if (val > 255) {
val = 255;
}
}
analogWrite(ledPin, val); // use the analogWrite function to set the brightness of the LED
}
Example 3: Using a remote control to change the brightness of the LED strip ribbon
int ledPin = 9; // select the pin for the LED
int val = 0; // variable to store the value for the LED brightness
int IRpin = 11; // pin where the IR receiver is connected
IRrecv irrecv(IRpin); // create an instance of the IRrecv class
decode_results results; // create an instance of the decode_results class
void setup() {
irrecv.enableIRIn(); // start the IR receiver
pinMode(ledPin, OUTPUT);
}
void loop() {
if (irrecv.decode(&results)) { // if a signal is received
if (results.value == 0xE0E040BF) { // if the value of the signal is for increasing the brightness
val = val + 25; // increase the brightness by 25
if (val > 255) {
val = 255;
}
}
else if (results.value == 0xE0E0807F) { // if the value of the signal is for decreasing the brightness
val = val – 25; // decrease the brightness by 25
if (val < 0) {
val = 0;
}
}
analogWrite(ledPin, val); // use the analogWrite function to set the brightness of the LED
irrecv.resume();
Here are some code examples of how to dim an LED lighting strip ribbon using a Raspberry Pi Pico microcontroller:
Example 1: Using a potentiometer to control the brightness of the LED strip:
import board
import adafruit_potentiometer
import pulseio
pot = adafruit_potentiometer.Potentiometer(board.A1)
led = pulseio.PWMOut(board.D12)
while True:
led.duty_cycle = int(pot.value / 65535 * 65535)
Example 2: Using a push button to switch between different brightness levels:
import board
import digitalio
import pulseio
button = digitalio.DigitalInOut(board.D7)
button.direction = digitalio.Direction.INPUT
button.pull = digitalio.Pull.UP
led = pulseio.PWMOut(board.D12)
while True:
if not button.value:
led.duty_cycle += 6553
if led.duty_cycle > 65535:
led.duty_cycle = 65535
else:
led.duty_cycle -= 6553
if led.duty_cycle < 0:
led.duty_cycle = 0
Example 3: Using a remote control to change the brightness of the LED strip ribbon
import board
import irremote
led = pulseio.PWMOut(board.D12)
ir_recv = irremote.IRReceiver(board.D11)
while True:
if ir_recv.read_ir():
if ir_recv.ir_code == <code for increase brightness>:
led.duty_cycle += 6553
if led.duty_cycle > 65535:
led.duty_cycle = 65535
elif ir_recv.ir_code == <code for decrease brightness>:
led.duty_cycle -= 6553
if led.duty_cycle < 0:
led.duty_cycle = 0
Here are some code examples of how to dim an LED lighting strip ribbon using MicroPython on a Raspberry Pi Pico microcontroller:
Example 1: Using a potentiometer to control the brightness of the LED strip:
from machine import ADC, Pin, PWM
pot = ADC(Pin(34))
led = PWM(Pin(25))
while True:
led.duty(int(pot.read() / 4095 * 1023))
Example 2: Using a push button to switch between different brightness levels:
from machine import Pin, PWM
button = Pin(26, Pin.IN, Pin.PULL_UP)
led = PWM(Pin(25))
while True:
if button.value() == 0:
led.duty(min(led.duty() + 10, 1023))
else:
led.duty(max(led.duty() – 10, 0))
Example 3: Using a remote control to change the brightness of the LED strip ribbon
from machine import Pin, PWM
import IRremote
led = PWM(Pin(25))
ir_recv = IRremote.IRReceiver(Pin(26))
while True:
if ir_recv.read_ir():
if ir_recv.ir_code == <code for increase brightness>:
led.duty(min(led.duty() + 10, 1023))
elif ir_recv.ir_code == <code for decrease brightness>:
led.duty(max(led.duty() – 10, 0))
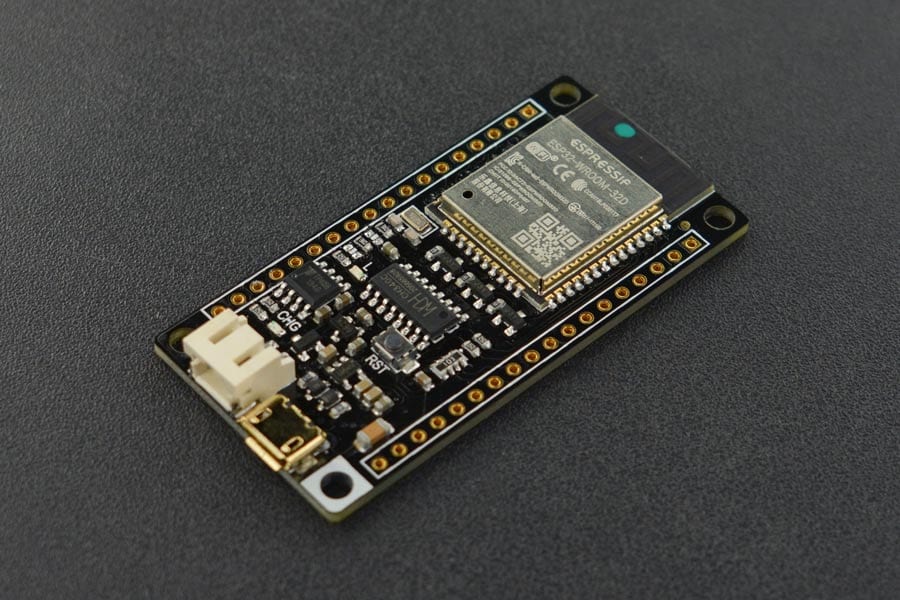
Using PWM to control LED dimming on an ESP32:
Example of Code for PWM to control LED dimming on an ESP32:
#include <driver/ledc.h>
// LEDC PWM channel configuration
ledc_channel_config_t ledc_channel = {
.channel = LEDC_CHANNEL_0,
.duty = 0,
.gpio_num = 21,
.speed_mode = LEDC_HIGH_SPEED_MODE,
.timer_sel = LEDC_TIMER_0
};
void setup() {
// Initialize LEDC PWM channel
ledc_channel_config(&ledc_channel);
}
void loop() {
// Set the duty cycle to 50%
ledc_set_duty(ledc_channel.speed_mode, ledc_channel.channel, 8191);
ledc_update_duty(ledc_channel.speed_mode, ledc_channel.channel);
delay(1000);
// Set the duty cycle to 75%
ledc_set_duty(ledc_channel.speed_mode, ledc_channel.channel, 12287);
ledc_update_duty(ledc_channel.speed_mode, ledc_channel.channel);
delay(1000);
// Set the duty cycle to 100%
ledc_set_duty(ledc_channel.speed_mode, ledc_channel.channel, 16383);
ledc_update_duty(ledc_channel.speed_mode, ledc_channel.channel);
delay(1000);
}
Using the analogWrite() function to control LED dimming on an ESP32:
#include <driver/ledc.h>
void setup() {
pinMode(21, OUTPUT);
}
void loop() {
// Set the LED to 50% brightness
analogWrite(21, 128);
delay(1000);
// Set the LED to 75% brightness
analogWrite(21, 192);
delay(1000);
// Set the LED to 100% brightness
analogWrite(21, 255);
delay(1000);
}
Using the ESPAsyncWebServer library to control LED dimming via a web page on an ESP32:
#include <ESPAsyncWebServer.h>
AsyncWebServer server(80);
void setup() {
pinMode(21, OUTPUT);
server.on(“/”, HTTP_GET, [](AsyncWebServerRequest *request){
request->send_P(200, “text/html”, “<html><body><form method=’get’ action=’/brightness’><input type=’range’ name=’brightness’ min=’0′ max=’255′><input type=’submit’ value=’Change Brightness’></form></body></html>”);
});
server.on(“/brightness”, HTTP_GET, [](AsyncWebServerRequest *request){
String brightness = request->arg(“brightness”);
int val = brightness.toInt();
analogWrite(21, val);
request->send_P(200, “text/html”, “<html><body>Brightness set to ” + brightness + “</body></html>”);
});
server.begin();
}